Hi! I moved my website to s3 + cloudflare for SSL certificate. Do you want to know how? I will show you:
First you will need to create new storage so Login to your AWS console as admin.
Create Bucket#
Click on services and then select S3 from storage section.
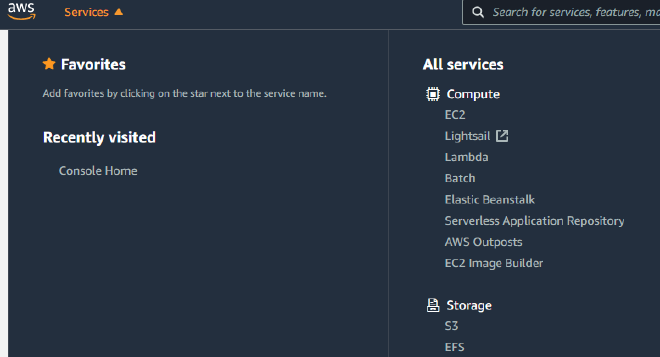
On page click on Create Bucket in right corner and:
- Change Bucket name in my case
www.themaymeow.com - Choose AWS Region
- Uncheck Block all public access
- Keep other unchanged
- Click Create Bucket
Update bucket properties#
You will see bucket lists so select you bucket and from bucket page select Properties tab

- From Bucket overview copy somewhere Amazon Resource Name ARN. you will need it later
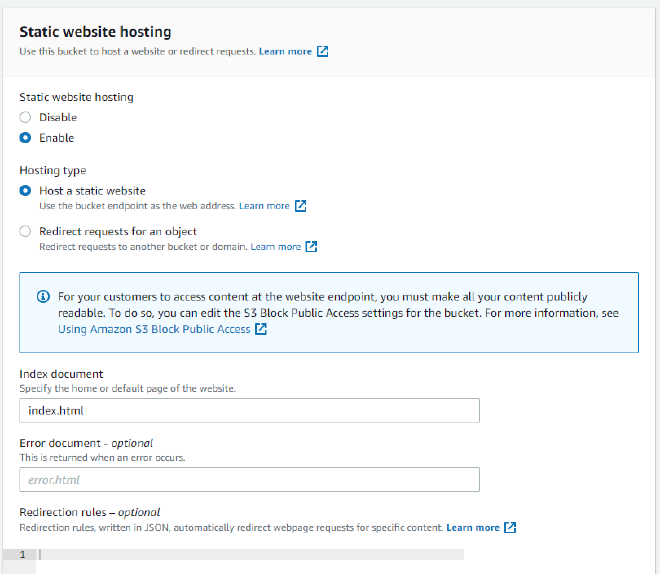
- Scroll down to Static Website hosting Click Edit
- Set “Static website Hosting” to enabled
- Hosting Type is “Host static website”
- Indes documment set to
index.html - Other things keep unchaged
- Scroll down and clik on Save Changes
- Copy somewhere your Bucket website endpoint
Update Permissions#
Select second tab Permissions scroll down to Bucket Policy click Edit and paste following policy.
{
    "Version": "2012-10-17",
    "Statement": [
        {
            "Sid": "Public",
            "Effect": "Allow",
            "Principal": "*",
            "Action": "s3:GetObject",
            "Resource": "<change-me-to-youw-ARN>/*"
        }
    ]
}
- Update your ARN you have copied
- Click Save cnages
Thats all for bucket configuration. Now you will need to create user who will be allowd to write content to you bucket.
Deployment user#
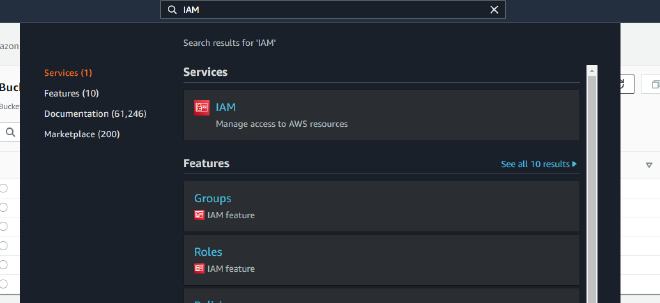
So search for Identity and Access management IAM and open it.
Create Policy#
First you will need to create policy. Find Policies in left menu and open it.
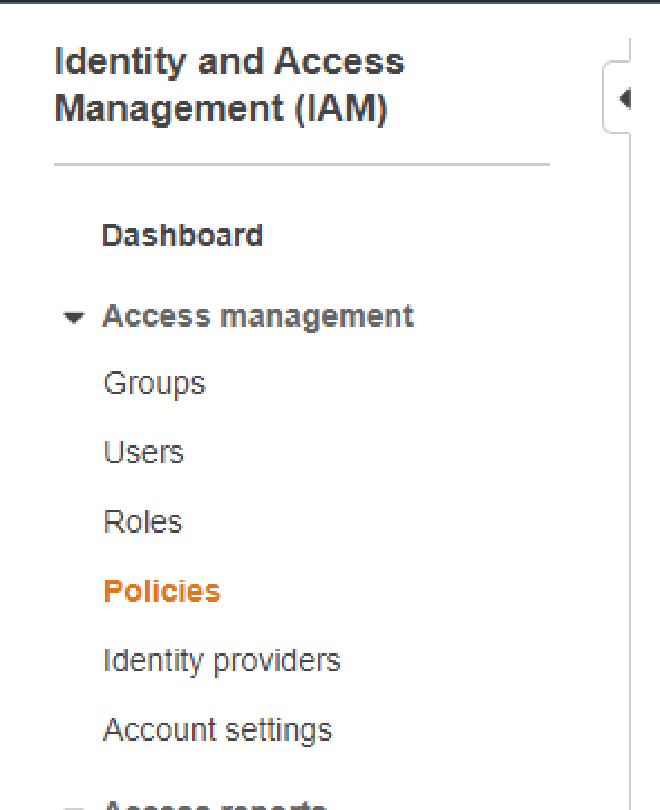
- Click Create policy
- Select JSON tab
- Paste following content and change your ARN
{
    "Version": "2012-10-17",
    "Statement": [
        {
            "Effect": "Allow",
            "Action": [
                "s3:ListAllMyBuckets"
            ],
            "Resource": "arn:aws:s3:::*"
        },
        {
            "Effect": "Allow",
            "Action": [
                "s3:ListBucket",
                "s3:GetBucketLocation"
            ],
            "Resource": "<change-me-to-youw-ARN>"
        },
        {
            "Effect": "Allow",
            "Action": [
                "s3:PutObject",
                "s3:PutObjectAcl",
                "s3:GetObject",
                "s3:GetObjectAcl",
                "s3:DeleteObject"
            ],
            "Resource": "<change-me-to-youw-ARN>/*"
        }
    ]
}
Important thing you will see "Resource": "<change-me-to-youw-ARN>" and "Resource": "<change-me-to-youw-ARN>/*" this is correct do not remove the /* on second one.
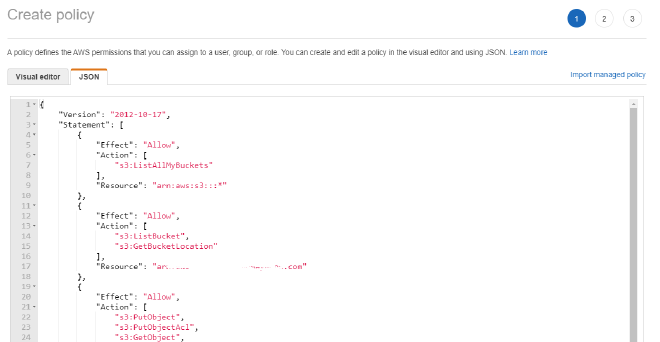
- Click Next Tags
- Click Next Review policy
- Update name
- Click Create Policy
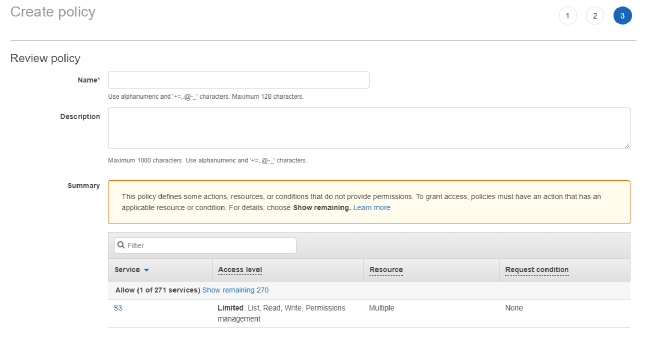
Create User#
On left menu select Users and click on Add user
- Change Name
- Access type select Programatic Access
- Click Next: permissions
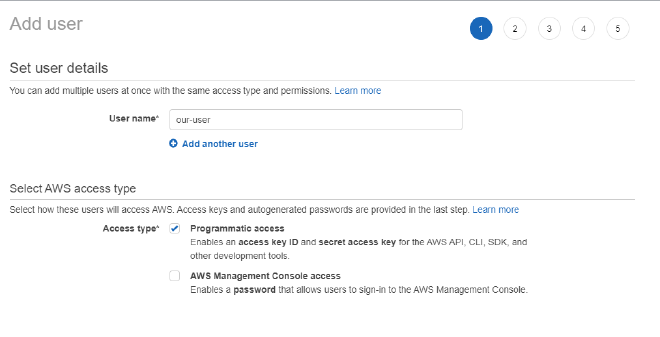
- Click on Create group
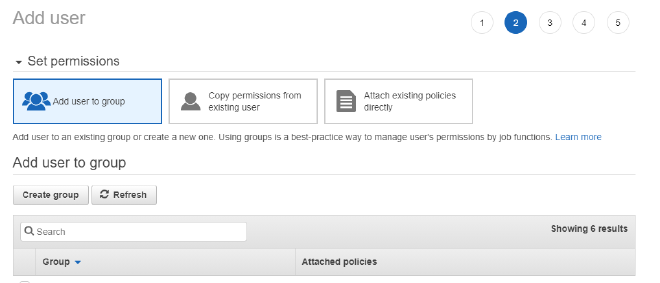
- Change Group name
- Select policy you created. you can use search or filter to show only users created policies
- Click Create gourp
- Click Next Tags
- Click Next Review
- Click Create User
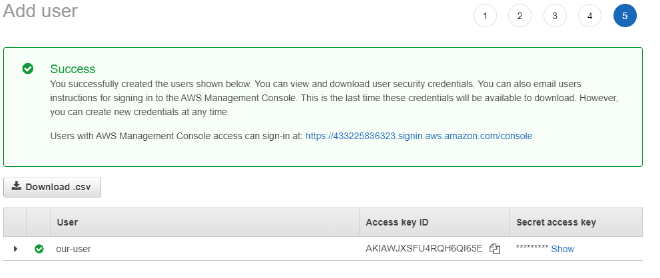
- Copy Access key ID and Secret access key to some place (you will need it)
- Click close
OK Thats All for settings on AWS. Next step is to configure our domain in Cloudflare
Add Domain to cloudflare#
Login to cloudflare and click to + Add a site
- Enter your site
- Click add site
- Select Cloudflare Free
- If you have dns records cloudflare will try to collect them
- Login to your privder and update your nameservers
- Cloudflare now try to verify you domain. (you can wait on page or you can close clodflare for now). Tehy will notify you.
Configure DNS rules#
Ok if you are back you have configured domain name. So click on it and select 3rd tab DNS

- Create rule type CNAME
- name set to
www - target set to your AWS website endpoint without
https:// - Proxy status set to proxy
Create second rule
- Set type to CNAME
- name set to
@ - target set to
www.yourdomain.tld - Proxy status set to enable
Configure SSL/tls#
Select 4th tab SSL/TLS
- Your ssl/tls encryption mode set to Flexibile because because we using certificates from AWS and not self signed ones
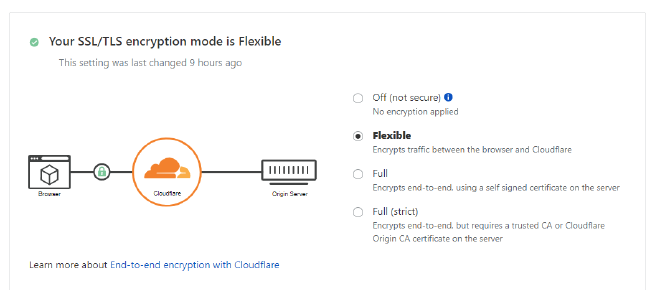
Select Edge certificates from tab

- Always Use HTTPS set to On

Setting up page rules#
Next and last thing is to redirect our naked domain domain.tld to www.domain.tld.
So select 10th tab Page Rules
- Click Create page rule
- Set If the rule matches
yourdomain.tld/* - Then The setings select Forwarding Url
- Next fiels select 301 Permanent redirect
- Set the desitnation url
https://www.yourdomain.tld/$1 - Click save and deploy.
Done#
Sot that all for prepare AWS + Cloudflare to your static website.
Bonus#
To deploy website to AWS you can use minio-cli Minio with following script manually or you can use CI/CD
mc config host add cdn https://s3.amazonaws.com <access-id> <secret-access-key> --api s3v4
mc cp -r paath/to/website/files cdn/bucket-name
Now just navigate to your new website and enjoy. :)
Photo by Billy Huynh on Unsplash
Reply by Email

